
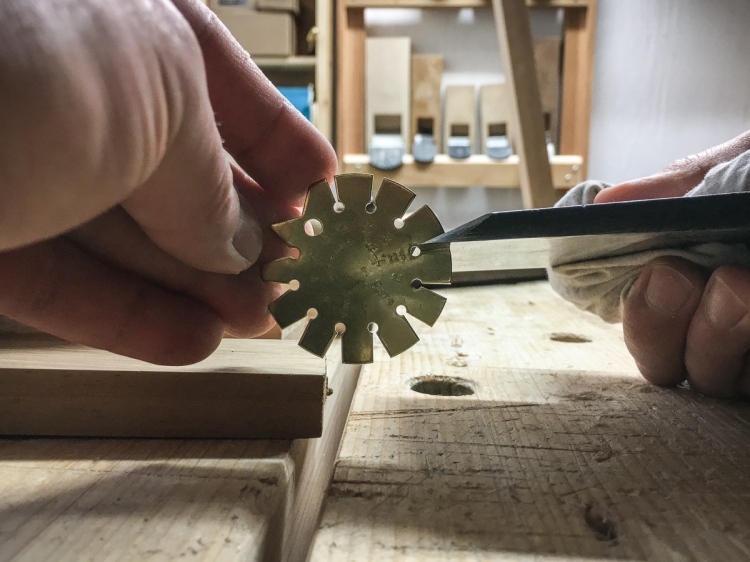
A lot has happened since I last wrote something here as I tend to use Instagram for short stories from the workshop these days. I had to impale my thumb on a sharp blade to actually take the time out and write something for this blog. I hope to do that more often (writing, not impaling!).
Tsunesaburo Kage
I mentioned this kanna on Instagram before; it was made by 3rd generation Tsunesaburo in Super Blue Paper steel. Since it arrived from Japan almost two months ago, the wooden body has had more than enough time to acclimate. Now I finally had a moment to sit down, have a look at the kanna in detail and see what is required to bring this secondhand tool back into service. So, before I do anything, let’s take stock of what we are dealing with here…
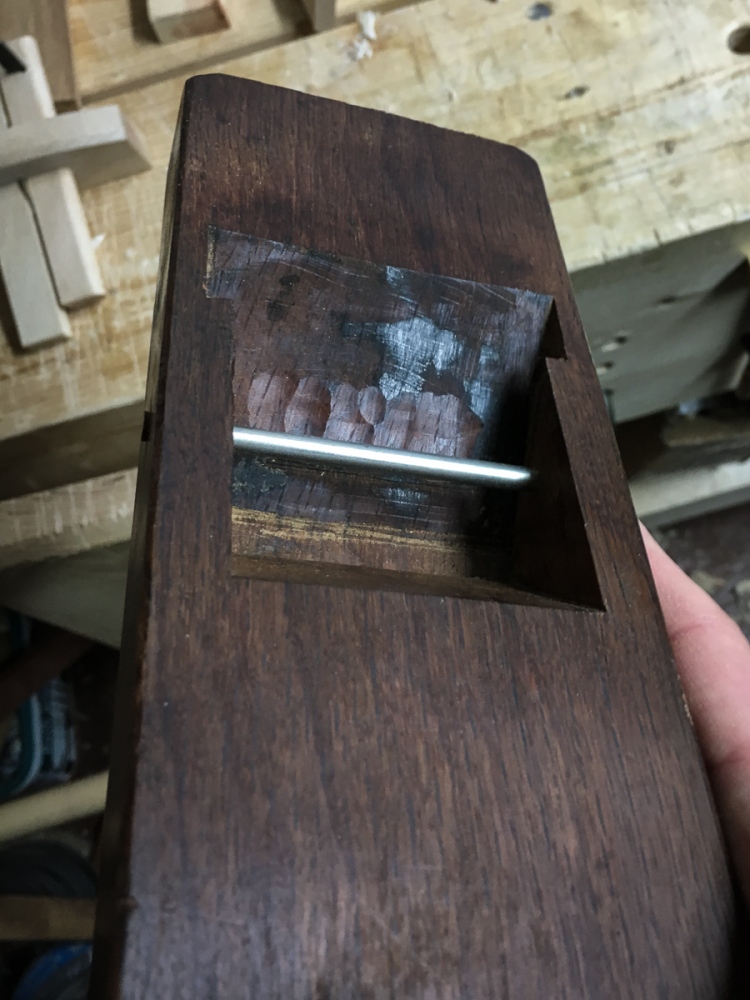
The dai
The dai is very well made in proper Japanese red oak (this is the true hon akagashi!), and generally well fitted, with one unorthodox treatment. There is a series of overlapping relief cuts clearly made with a gouge, in the lower part of the plane bed.
An unusually relieved section like that would have probably provided a quick way to ease an aspect of tightness in fit, or perhaps to eliminate a bulging section on the sole of the dai created once the blade is pushed forward. Normally, we would take time and remove as little material as is necessary so I guess the previous owner fancied a quick shortcut. Maybe this happened on site and there was little time to fine tune bit by bit.
Seeing this I was initially apprehensive; however, the dai seems to actually work well and all initial adjustments seem possible without issues. I could obviously fill the undulations and gradually re-fit the blade but in some sense this is an ownership history aspect; the tool lives on to tell the tale of previous use. I can’t see it once the blade is in place anyway and I have bigger problems I choose to fret about in life so I simply move on.
The mouth of the plane is tsutsumi (i.e. has a ledge behind the bevel of the blade which closes up the mouth opening from behind). This generally reflects higher quality/resale price in market terms as more work is required to make this type of opening. While a nice touch, especially when new, the ledge is inconsequential to the performance of the dai and as it wears further it takes on a more and more ‘ragged’ look. This is already happening here as you can see above.
Another aspect that I will need to address (and, this time, for functional reasons) is the fact that the chipbreaker does not fit in the opening. The dai will have moved (shrunk) to this point so I will need to restore the fit.
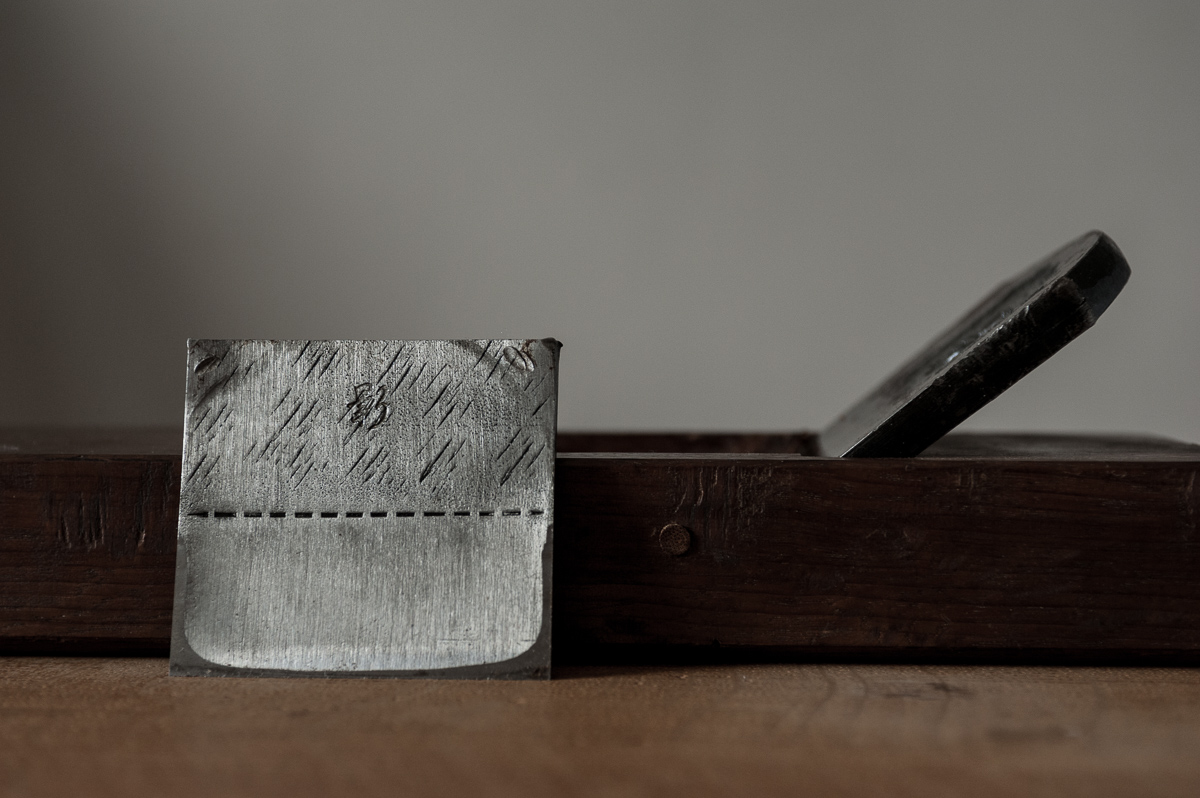
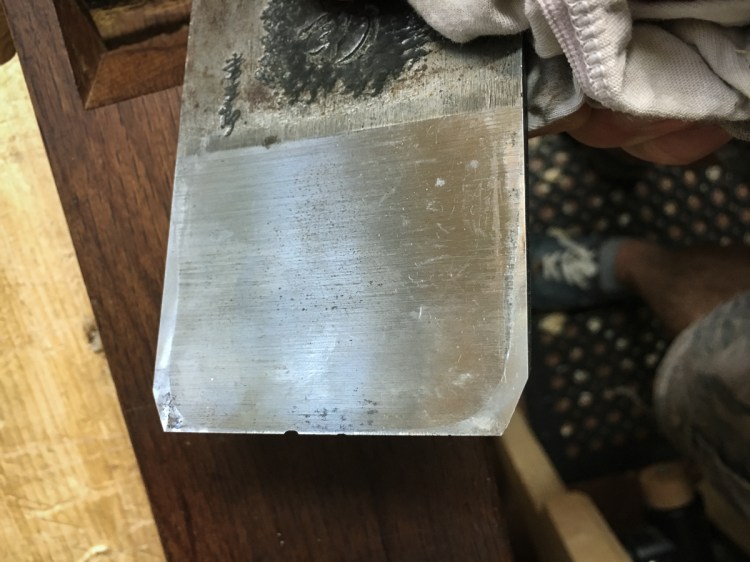
The blade
The blade is in overall good condition, with minor surface rust spots. There is obvious chipping in the steel edge which will have to be addressed.

The bevel is set at a very low angle of around 22.5 degrees. My preference will be to raise that bevel to a steeper angle; this will take care of the chips in the edge as well.
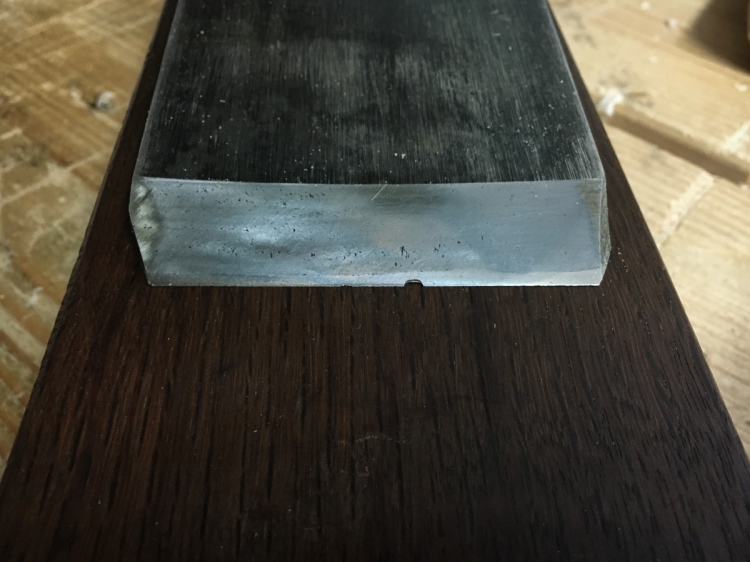
The ura is well preserved. The flat on the back of the edge is very narrow and will require quite some work to increase it, considering I will have to shorten the blade by a couple of millimetres to raise the bevel angle.
The cutting edge is also a bit too wide for the chipbreaker and will need to be fitted by grinding the ‘ears’ on the sides. The existing ears are unevenly ground and they marginally offset the edge to one side, too.
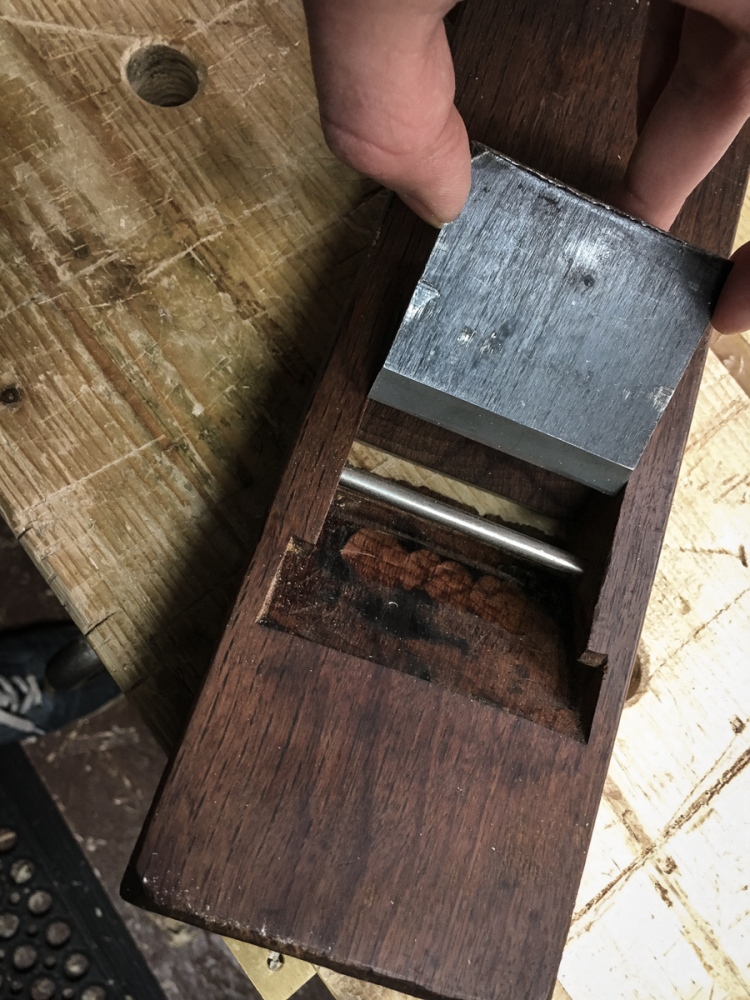
Chipbreaker
This is a tomo-osae, i.e. a matching chipbreaker made by the same blacksmith, so it was also made by Tsunesaburo. It is in great condition. Bevel at 20 degrees and secondary bevel at around 80. Spot on. Both need to be refreshed but there is nothing to worry about or fix on this end.
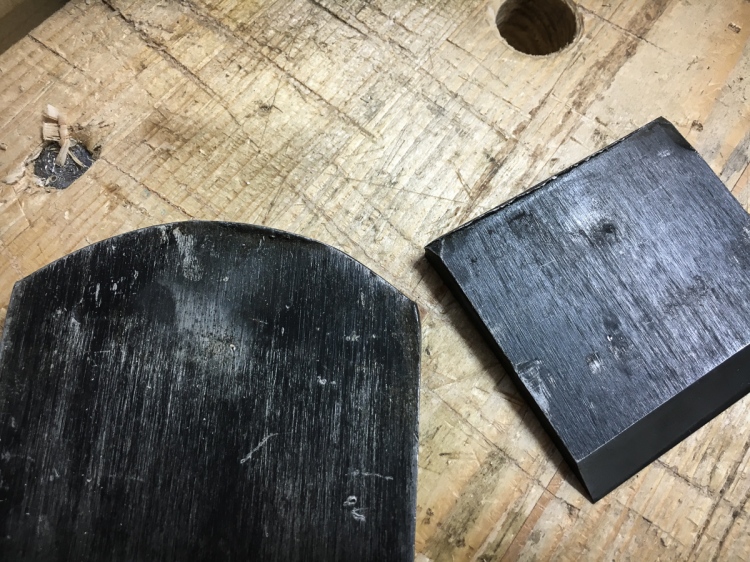
The top of the chipbreaker, however, is mushroomed over (see in the photo above, on the right) and so is the main blade, slightly. I will be addressing this – for aesthetic, not functional reasons.
Next time, we will start by taking these two to the grinder…

Great post! I just returned from Hida Tools in Berkeley and boy, do I wish I had you in tow to guide my eye and hand to the right dai and chisel. My gut is that this isn’t the right place, but I also felt like an elephant trying to pick out a tutu, so it also could very well be me. Looking forward to the next installment, and I hope your digit heels pronto.
LikeLiked by 1 person
Thank you Peter. Sometimes, the first step is the hardest, isn’t it… if, however, you didn’t feel right about it then by all means you probably made the right choice by withholding the decision to buy.
LikeLike
A tool I like to use for putting a blending patina on blades is a Birchwood Casey touch up pen. It looks just like a “Sharpie” but it has acid instead of ink and is used for touching up worn gun bluing.
LikeLiked by 1 person
Interesting! Thank you, I will look into this.
LikeLike